Friday 28 October 2011

Create Bootable USB Pen Drive for Windows 7

0 comments
Installing Windows from a USB flash drive has several advantages : First of all, the overall speed of the installation process will increase significantly, carrying a USB stick is much more convenient than a DVD, and finally it becomes possible to install the OS even on those systems that do not have a DVD drive, such as a netbook.
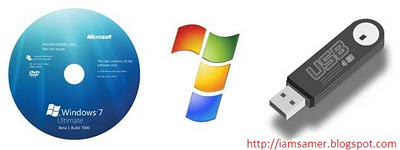
 

In this post, I will show you how to load the Windows installation on to your USB flash drive and make it bootable just like the DVD.
Tools Required:
1. USB flash drive with a minimum capacity of 4 GB.
2. Windows 7 Setup DVD.
Step 1 : Plug-in your USB flash drive.
Step 2 : Open the PowerShell (OR Command Prompt if PowerShell Not Exist). If you are using Windows 7/Vista then open it with administrator rights*.
* Goto Start -> All Programs -> Accessories ->Windows PowerShell ->  Right-click on “Windows PowerShell” and select “Run as Administrator”.
Step 3: In the PowerShell, type 
DISKPART

This will start the Microsoft DiskPart utility as shown below:
Now issue the following command:
LIST DISK

This will show you a list of  available disks on your system. Disk 0 is usually the hard disk. In my case, Disk 1 is the USB drive (this can be a different one in your case). Now issue the command as shown below:


 SELECT DISK 1


 above command, 1 is the USB drive number on my system. If you have a different number on your system, then you need to replace 1 with that number.
Step-4: Now issue the following list of commands one by one as shown below:

CLEAN
CREATE PARTITION PRIMARY
SELECT PARTITION 1
ACTIVE
FORMAT FS=NTFS QUICK
ASSIGN
EXIT


Close Power Shell and proceed to the next step.
Step 5: Insert the Windows 7/Vista installation disc and note down the “drive letter” of your DVD drive. In my case, it is “H:”.


Open the command prompt. If you are using Windows 7/Vista then open it with administrator rights*.
* Goto Start -> All Programs -> Accessories -> Right-click on “Command Prompt” and select “Run as Administrator”.

Now type the following list of commands as shown below:
H:
CD BOOT
BOOTSECT.EXE /NT60 G:(NOTE:
G: is your USB drive letter)

EXIT


Step-6: Copy the contents of your Windows 7/Vista installation disk into the USB flash drive.
Directly Copy-Paste All DVD file into Usb Stick Then…

Your USB stick is now ready to boot and install the OS for you. Don’t forget to enable the “USB Boot” option and change the “Boot priority to USB device from hard disk” in your BIOS settings.

Bypass Software Trial Period Manually in Windows

0 comments
Today I am going to show you how you can bypass software trial period manually and use that again and again.


Follow the below Steps:

1. First you have to uninstall that application whose trial period is over and you wanna use it again.

2. Now open the “Regedit” you can open it by going to Start > Run > Regedit.

3. Navigate to HK Local Machine > Software > Your Software name.

4. Now simply Delete the Key.

5. You have to do this for HK Current user if key is there too.

6. Now go to Run and Type “%temp%”.

7. Delete all files in temporary folder, these are all the files created by software temporary installation and de-installation.

8. Go to C:// Users > Username > App-data ( Check all 3 directories “Local”, “LocalLow”, “Roaming” for your software entry there might be a folder for your software, if you find one Delete that.

9.Now every main step is done you can restart your computer and then Reinstall application.
That’s it now you will get your software’s trial period back, well yes steps are long but it’s the manual way you can bypass the trial period of your software and you can perform this everytime your software expires.

How to Restart Windows Without Restarting

0 comments
Guys sometimes you come across a stage where you need to restart your computer @ time of installing new software well but you don’t wanna restart as due to some reasons so what we can do is a Cold Reboot which does not Restarts your Computer but Restarts your System.

Follow these below Steps to see how it work: 

1. Whenever you want to Cold Reboot your Computer simply HOLD Shift Key and then click on restart button check example below...
2. So now you got it how you can easily restart your Windows without restarting your computer.
3. So have fun guys and make sure you comment below if you find any problems.

Wednesday 26 October 2011

List of RUN Command of Windows Xp

0 comments
  1.  SQL Client Configuration - cliconfg
  2.  System Configuration Editor - sysedit
  3.  System Configuration Utility - msconfig
  4.  System File Checker Utility (Scan Immediately)- sfc /scannow
  5.  System File Checker Utility (Scan Once At Next Boot)- sfc /scanonce
  6.  System File Checker Utility (Scan On Every Boot) - sfc /scanboot
  7.  System File Checker Utility (Return to Default Setting)- sfc /revert
  8.  System File Checker Utility (Purge File Cache)- sfc /purgecache
  9.  System File Checker Utility (Set Cache Size to size x)-sfc/cachesize=x
  10.  System Information - msinfo32.
  11.  Task Manager - taskmgr
  12.  System Properties - sysdm.cpl
  13.  Task Manager ? taskmgr
  14.  TCP Tester - tcptest
  15.  Telnet Client - telnet
  16.  Tweak UI (if installed) - tweakui
  17.  User Account Management- nusrmgr.cpl
  18.  Utility Manager - utilman
  19.  Windows Address Book - wab
  20.  Windows Address Book Import Utility - wabmig
  21.  Windows Backup Utility (if installed)- ntbackup
  22.  Windows Explorer - explorer
  23.  Windows Firewall- firewall.cpl
  24.  Windows Magnifier- magnify
  25.  Windows Management Infrastructure - wmimgmt.msc
  26.  Windows Media Player - wmplayer
  27.  Windows Messenger - msmsgs
  28.  Windows Picture Import Wizard (need camera connected)- wiaacmgr
  29.  Windows System Security Tool ? syskey
  30.  Windows Update Launches - wupdmgr
  31.  Windows Version (to show which version of windows)- winver
  32.  Windows XP Tour Wizard - tourstart
  33.  Wordpad - write
  34.  Password Properties - password.cpl
  35.  Performance Monitor - perfmon.msc
  36.  Phone and Modem Options - telephon.cpl
  37.  Phone Dialer - dialer
  38.  Pinball Game - pinball
  39.  Power Configuration - powercfg.cpl
  40.  Printers and Faxes - control printers
  41.  Printers Folder ? printers
  42.  Private Character Editor - eudcedit
  43.  Quicktime (If Installed)- QuickTime.cpl
  44.  Real Player (if installed)- realplay
  45.  Regional Settings - intl.cpl
  46.  Registry Editor - regedit
  47.  Registry Editor - regedit32
  48.  Remote Access Phonebook - rasphone
  49.  Remote Desktop - mstsc
  50.  Removable Storage - ntmsmgr.msc
  51.  Removable Storage Operator Requests - ntmsoprq.msc
  52.  Resultant Set of Policy (XP Prof) - rsop.msc
  53.  Scanners and Cameras - sticpl.cpl
  54.  Scheduled Tasks - control schedtasks
  55.  Security Center - wscui.cpl
  56.  Services - services.msc
  57.  Shared Folders - fsmgmt.msc
  58.  Shuts Down Windows - shutdown
  59.  Sounds and Audio - mmsys.cpl
  60.  Spider Solitare Card Game - spider
  61.  Malicious Software Removal Tool - mrt
  62.  Microsoft Access (if installed) - access.cpl
  63.  Microsoft Chat - winchat
  64.  Microsoft Excel (if installed) - excel
  65.  Microsoft Frontpage (if installed)- frontpg
  66.  Microsoft Movie Maker - moviemk
  67.  Microsoft Paint - mspaint
  68.  Microsoft Powerpoint (if installed)- powerpnt
  69.  Microsoft Word (if installed)- winword
  70.  Microsoft Syncronization Tool - mobsync
  71.  Minesweeper Game - winmine
  72.  Mouse Properties - control mouse
  73.  Mouse Properties - main.cpl
  74.  Nero (if installed)- nero
  75.  Netmeeting - conf
  76.  Network Connections - control netconnections
  77.  Network Connections - ncpa.cpl
  78.  Network Setup Wizard - netsetup.cpl
  79.  Notepad - notepad
  80.  Nview Desktop Manager (If Installed)- nvtuicpl.cpl
  81.  Object Packager - packager
  82.  ODBC Data Source Administrator- odbccp32.cpl
  83.  On Screen Keyboard - osk
  84.  Opens AC3 Filter (If Installed) - ac3filter.cpl
  85.  Outlook Express - msimn
  86.  Paint ? pbrush
  87.  Keyboard Properties - control keyboard
  88.  IP Configuration (Display Connection Configuration) - ipconfi/all
  89.  IP Configuration (Display DNS Cache Contents)- ipconfig /displaydns
  90.  IP Configuration (Delete DNS Cache Contents)- ipconfig /flushdns
  91.  IP Configuration (Release All Connections)- ipconfig /release
  92.  IP Configuration (Renew All Connections)- ipconfig /renew
  93.  IP Configuration(RefreshesDHCP&Re-RegistersDNS)-ipconfig/registerdns
  94.  IP Configuration (Display DHCP Class ID)- ipconfig/showclassid
  95.  IP Configuration (Modifies DHCP Class ID)- ipconfig /setclassid
  96.  Java Control Panel (If Installed)- jpicpl32.cpl
  97.  Java Control Panel (If Installed)- javaws
  98.  Local Security Settings - secpol.msc
  99.  Local Users and Groups - lusrmgr.msc
  100.  Logs You Out Of Windows - logoff.....
  101.  Accessibility Controls - access.cpl
  102.  Accessibility Wizard - accwiz
  103.  Add Hardware - Wizardhdwwiz.cpl
  104.  Add/Remove Programs - appwiz.cpl
  105.  Administrative Tools control - admintools
  106.  Adobe Acrobat (if installed) - acrobat
  107.  Adobe Designer (if installed)- acrodist
  108.  Adobe Distiller (if installed)- acrodist
  109.  Adobe ImageReady (if installed)- imageready
  110.  Adobe Photoshop (if installed)- photoshop
  111.  Automatic Updates - wuaucpl.cpl
  112.  Bluetooth Transfer Wizard ? fsquirt
  113.  Calculator - calc
  114.  Certificate Manager - certmgr.msc
  115.  Character Map - charmap
  116.  Check Disk Utility - chkdsk
  117.  Clipboard Viewer - clipbrd
  118.  Command Prompt - cmd
  119.  Component Services - dcomcnfg
  120.  Computer Management - compmgmt.msc
  121.  Control Panel - control
  122.  Date and Time Properties - timedate.cpl
  123.  DDE Shares - ddeshare
  124.  Device Manager - devmgmt.msc
  125.  Direct X Control Panel (If Installed)- directx.cpl
  126.  Direct X Troubleshooter- dxdiag
  127.  Disk Cleanup Utility- cleanmgr
  128.  Disk Defragment- dfrg.msc
  129.  Disk Management- diskmgmt.msc
  130.  Disk Partition Manager- diskpart
  131.  Display Properties- control desktop
  132.  Display Properties- desk.cpl
  133.  Display Properties (w/Appearance Tab Preselected)- control color
  134.  Dr. Watson System Troubleshooting Utility- drwtsn32
  135.  Driver Verifier Utility- verifier
  136.  Event Viewer- eventvwr.msc
  137.  Files and Settings Transfer Tool- migwiz
  138.  File Signature Verification Tool- sigverif
  139.  Findfast- findfast.cpl
  140.  Firefox (if installed)- firefox
  141.  Folders Properties- control folders
  142.  Fonts- control fonts
  143.  Fonts Folder- fonts
  144.  Free Cell Card Game- freecell
  145.  Game Controllers- joy.cpl
  146.  Group Policy Editor (XP Prof)- gpedit.msc
  147.  Hearts Card Game- mshearts
  148.  Help and Support- helpctr
  149.  HyperTerminal- hypertrm
  150.  Iexpress Wizard- iexpress
  151.  Indexing Service- ciadv.msc
  152.  Internet Connection Wizard- icwconn1
  153.  Internet Explorer- iexplore
  154.  Internet Setup Wizard- inetwiz
  155.  Internet Properties- inetcpl.cpl

Cloning of a SIM Card

0 comments
Step 1
First you'll need the IMSI (International Mobile Subscriber Identifier) number. This string of numbers is usually
imprinted on the SIM card itself.
This is an example of an IMSI number:IMSI:429011234567890
An IMSI is usually 15 digits long, but can be one or two digits shorter.

Step 2
Now you have your IMSI number you'll need the authentication key (Ki), which is unique to your SIM. This number
can only be discovered electronically using a SIM duplicator, which is an external device that you will slot the SIM
card into.A SIM duplicator is relatively inexpensive - they can be found at around the $10 mark - and can be purchased
at multiple locations. A Google search for 'Super SIM' will turn up at least several online outlets.

Step 3
When the SIM duplicator is connected to your PC and your SIM card, it will attempt to acquire the Ki number and
copy the entire contents. When a new SIM card is placed into the duplicator after this process is complete, that data
will be copied and, for all intents and purposes, the new SIM will be identical to the old.
Things You'll Need:
SIM card
SIM card duplicator.

How To Convert FAT File System in Windows

0 comments

How To Convert File System? FAT - FAT32 to NTFS

open a dos prompt and give the command

convert d: /fs:ntfs

this command would convert your d: drive to NTFS.

if the system cannot lock the drive, you will be prompted to convert it during next reboot.

Normally you should select yes.

Conversion from fat/fat32 to ntfs is non-destructive, your data on the drive will NOT be lost.

Be aware that converting to NTFS will make that partition of your drive unreadable under dos unless you have NTFS utilites to do so.

USB can Hack PC

0 comments

Now days we use Hack in many ways not only in Online but as a Slang, so Hacking passwords or any information using USB (Pendrives).Here is the small tricks guys for stealing information or passwords of ur friends or enemies using pendrives...


  1. Extract it.
  2. Open pcinfo
  3. Select all the files and paste it in ur USB(pendrive)
  4. Insert it in the pc u wanna hack...
  5. Open the USB drive, give it 2 sec and and ur job is done...
And now open the dump folder in ur pc and u will have all the info u want....

Information you will obtain.
THIS POST IS INTENDED FOR LEARNING PURPOSES ONLY!, WE WOULD NOT TAKE ANY RESPONSIBILITY FOR ANY KIND OF ILLEGAL ACTIVITY FROM YOUR SIDE.

Tuesday 25 October 2011

How to Remove WINRAR Password

0 comments


Winrar Password Remover makes use of its powerful brute force and dictionary attack to crack the passwords of Winrar archives.
  
Password: hackingguide


Saturday 22 October 2011

How to Remove Subscribe to Posts Atom Link From Blogger

0 comments
Hello Friends! Remove "Subscribe to: Posts(Atom)" Link From Blogger. You can locate this links bellow every post or page, near to page navigation.
In every post page there is a link like "Subscribe to: Post Comments(Atom)"
In every page other then post page it may be like "Subscribe to: Post (Atom)"

Here is a Screen-shot for You :>


How to hide this Links?
1. Go to Blogger Dashboard > Design tab > Edit HTML tab
2. Press Check  Expand Widget Templates checkbox
3. Then serach for the following line of code and remove it.

<b:include name='feedLinks'/>
and Save Your template.
Done

Submit Your Blog to Top 50+ Blog Directories

3 comments
Blog Directories are important and add an essential element to your web site traffic

Blog Directories are Social element to your web site traffic generation and search engine optimization programs. Listing in Blog Directories is rarely time wasted. Maximizing the potential of Blog Directories does require the same effort as your current Social Networking. Listing is fine and a good first step, but to really bring in the qualified leads many of the Blog Directories have developed into communities. Interacting with other members reaps similar benefits to Social Media Marketing Programs enabling you build your voice of authority on your required topics.

Here is a List : 


Blogs.com
Bloglines.com
Blogged.com
Topblogarea.com
Blogopedia.com
Plazoo.com
Blogorama.com
http://www.technorati.com/ping
http://www.boingboing.net/
http://www.blogs.com/submit
http://www.blogpulse.com/submit.html
http://www.blo.gs/
http://www.icerocket.com/
http://www.blogged.com/
http://www.leftyblogs.com/
http://www.blogcatalog.com/
http://bloghop.com/
http://blogdigger.com/add.jsp
http://www.weblogalot.com/
http://www.bloggapedia.com/
http://www.bloggernity.com/
http://www.blog-directory.org/
http://www.blogdire.com/
http://flookie.net/
http://www.today.com/submit-blog
http://www.blogexplosion.com/
http://superblogdirectory.com/
http://www.bloglisting.net/
http://outpost-earth.com/
http://www.feedage.com/
http://www.blogio.net/
http://www.blogoriffic.com/
http://www.blogflux.com/
http://www.lsblogs.com/
http://blogville.us/
http://www.sarthak.net/blogz/add.php
http://wutzle.com/
http://www.myblogdirectory.net/
http://www.blogratedirectory.com/
http://www.blogrankings.com/
http://www.submitblognow.info/
http://scienceport.org/index.php
http://www.readablog.com/
http://www.blogicas.com/directory/
http://www.blogsrating.com/
http://www.blogbunch.com/
http://www.anse.de/rdfticker/addchannel.php
http://www.wilsdomain.com/
http://www.blogs-collection.com/
http://www.bloggernow.com/
http://www.shoutyoursite.com/
http://www.blogtoplist.com/
http://www.ablogin.com/
http://www.blog-collector.com/
http://www.spicypage.com/index.cfm
http://www.webloogle.com/
http://www.goldenfeed.com/
http://www.feedgy.com/
http://feedmil.com/
http://www.heliosblogs.com/
http://www.blogfolders.com/
http://www.freshlinkmedia.net/
http://iblogz.org/


If You Find This Post Helpful Please Comment Below


Friday 14 October 2011

Make Your Friend Fool By Call Divert "The Number Does Not Exist"

0 comments

You have often heard most of times these words “The Number Does Not Exist”. Some times we don’t want to talk with a particular person so there is a way to avoid from those friends. Follow these steps:

  • Go to Call Divert Option from your cell.
  • Divert call to friend number from whom you want to avoid.
  • Now whenever he or she will call they get an error saying “The Number Does Not Exist”.

Remember to cancel Call Divert after cheating otherwise all your incoming call goes to him and outgoing charges apply for you whenever they receive your call.

Sunday 9 October 2011

How To Remove Blogger Attribution Gadget?

0 comments

Making blog is not a difficult task, but making it effective and user freindly is not so much. Follow these steps for removing blogger attribution gadget:


  •     Log in to Blogger.
  •     Go to "Design" tab from the top tab bar under your blog's name.
  •     Go to "Template Designer" and choose the "Advanced" tab from the upper left.
  •     Scroll to the bottom of the list of options and select "Add CSS"
  •     In "Add custom CSS" type this 
  •     #Attribution1 {display: none;}
  •     Click "Apply to blog".
  •     That's all, check your blog now.

How To Disable Autorun Option

0 comments
Follow these Steps:
  • Go to start>run>Type gpedit.msc
  • Under Group Policy Editor, go to Computer Configuration> Administrative Templates> System
  • Under System, look for Turn off Autoplay.
  • Open it, set the value to Enabled.
  • Apply &  OK.
  • Enjoy.....

Saturday 8 October 2011

Fix Windows XP Corrupted Files

0 comments
Follow these steps:

    Place the Windows XP cd in your cd/dvd drive.
    Go to start>run>cmd>Type sfc/scannow

It will fix all corrupted system files.

How To Make an Autorun CD/DVD

0 comments


Do you want to run your program on CD/DVD automatically when you insert it? Here's a way for making an Autorun CD/DVD:-


Open notepad
    Type
    [autorun]
    OPEN=install\name.exe (name.exe is the name of your setup file).
    Save it as autorun.inf
    That's all.

Wednesday 5 October 2011

Audio Drivers

1 comments


Download Drivers Addonics http://www.addonics.com -Drivers

Download Drivers AMD http://www.amd.com -Drivers

Download Drivers Amptron http://www.amptron.com -Drivers

Download Drivers Analog Devices http://www.soundmax.com -Drivers

Download Drivers ASound http://www.asound.com -Drivers

Download Drivers Astro Gaming http://www.astrogaming.com -Drivers

Download Drivers ASUS http://www.asus.com.tw -Drivers

Download Drivers AudioExcel http://www.chaintech.com.tw -Drivers

Download Drivers AudioTrak http://www.audiotrak.net -Drivers

Download Drivers Avance Logic http://www.realtek.com.tw -Drivers

Download Drivers AXLE http://www.axle-hk.com -Drivers

Download Drivers Aztech Labs http://www.aztech.com -Drivers

Download Drivers Bgears http://www.bgears.com -Drivers

Download Drivers Boca Research http://www.bocaresearch.com -Drivers

Download Drivers BTC http://www.btc.com.tw -Drivers

Download Drivers C-Media (CMI) http://www.cmedia.com.tw -Drivers

Download Drivers Compaq http://www.compaq.com -Drivers

Download Drivers Compro http://www.compro.com.tw -Drivers

Download Drivers Creative Labs http://www.soundblaster.com -Drivers

Download Drivers Crystal Semiconductor http://www.crystal.com -Drivers

Download Drivers Diamond Multimedia http://www.diamondmm.com -Drivers

Download Drivers Digital Audio http://www.digitalaudio.com -Drivers

Download Drivers Digital Research Tech. http://www.dr-tech.com -Drivers

Download Drivers DSP Solutions Inc. http://www.dspsolutions.com -Drivers

Download Drivers DTK Computer http://www.dtk.com.tw -Drivers

Download Drivers ESS Technology http://www.esstech.com -Drivers

Download Drivers EXP Computer Inc. http://www.expnet.com -Drivers

Download Drivers Formosa (FIC) http://www.nfic.com.tw -Drivers

Download Drivers Frontier Design http://www.FrontierDesign.com -Drivers

Download Drivers Fujitsu http://www.fujitsu.com -Drivers

Download Drivers Gravis http://www.gravis.com -Drivers

Download Drivers Guillemont International http://www.guillemot.com -Drivers

Download Drivers Hauppauge http://www.hauppauge.com -Drivers

Download Drivers Hewlett Packard (HP) http://www.hp.com -Drivers

Download Drivers I/O Magic http://www.iomagic.com -Drivers

Download Drivers IBM http://www.ibm.com -Drivers

Download Drivers Intel http://www.intel.com -Drivers

Download Drivers Jaton Corp http://www.jaton.com -Drivers

Download Drivers Jet Way http://www.jetway.com.tw -Drivers

Download Drivers Joytech http://www.joytech.com -Drivers

Download Drivers Kouwell (keyvision) http://www.kouwell.com.tw -Drivers

Download Drivers KTX http://www.microtekusa.com -Drivers

Download Drivers Logitech http://www.logitech.com -Drivers

Download Drivers Mad Dog http://www.mdmm.com -Drivers

Download Drivers Malifax Computers http://www.malifax.com.sg -Drivers

Download Drivers MediaSonic http://www.mediasonic.com -Drivers

Download Drivers Mediatek http://www.mediatek.com.tw -Drivers

Download DriversMediatrix http://www.mediatrix.com -Drivers

Download Drivers Mitsumi http://www.eciusa.com -Drivers

Download Drivers Monster http://www.monstercable.com -Drivers

Download Drivers Onspec Electronics http://www.onspecinc.com -Drivers

Download Drivers OPTi http://www.opti-inc.com -Drivers

Download Drivers Orchid http://www.diamondmm.com -Drivers

Download Drivers Packard Bell http://www.packardbell.com -Drivers

Download Drivers Philips http://www.philips.com.br -Drivers

Download Drivers Phoebe Micro http://www.phoebemicro.com -Drivers

Download Drivers Pine Group http://www.pinegroup.com -Drivers

Download Drivers Psyko Audio http://www.psykoaudio.com -Drivers

Download Drivers Quickshot http://www.quickshot.com -Drivers

Download Drivers Razer http://www.razerzone.com -Drivers

Download Drivers Realtek (RMC) http://www.realtek.com.tw -Drivers

 Download DriversRoland http://www.rolandus.com -Drivers

Download Drivers SIIG http://www.siig.com -Drivers

 Download DriversSilicom Multimedia http://www.techadvice.com -Drivers

Download Drivers SiS http://www.sis.com -Drivers

Download Drivers SRS Labs http://www.srslabs.com -Drivers

Download Drivers Steinberg http://service.steinberg.de -Drivers

Download Drivers Sun Moon Star http://www.sunmoonstar.com -Drivers

Download Drivers Terratec Promedia http://www.terratec.de Drivers

Download Drivers ThunderMax http://www.j-mark.com/dl/dl -Drivers

Download Drivers Trident http://www.tridentmicro.com -Drivers

Download Drivers Turtle Beach http://www.tbeach.com -Drivers

Download Drivers VIA http://www.via.com.tw -Drivers

Download Drivers VideoLogic http://www.videologic.com -Drivers

Download Drivers Yakumo http://www.yakumo.de -Drivers

Download Drivers Yamaha http://www.yamaha.com -Drivers

Download Drivers Zoltrix http://www.zoltrix.com -Drivers


Link Exchange With I am SAMER

Sunday 2 October 2011

Advanced Way to Hack Passwords by Desktop Phishing

0 comments
Notice: THIS POST IS INTENDED FOR LEARNING PURPOSES ONLY!, WE WOULD NOT TAKE ANY RESPONSIBILITY FOR ANY KIND OF ILLEGAL ACTIVITY FROM YOUR SIDE

In normal phishing technique Attacker convinces the victim to click on the link of fake login page.In which the victim enters his sensitive info.(passswords) in the fake login page and all information(user name and passwords) goes to attacker.But the main drawback of normal phishing technique is that victim can easily differentiate between fake and real login page by looking at the domain name in the address bar.But in the advance technique of desktop phishing. We can overcome this problem by spoofing domain name.In which the address bar showing real address but in actual your fake login page is there.

See How to do this:-

Before continuing this article you need to know what is HOSTS file and how it works?

The hosts file  is a text file containing domain names and IP address associated with them.which is located in the window directory with the following path C:\Windows\System32\drivers\etc\ . Whenever we visit any website, say www.anywebsite.com , an query is sent to  Domain Name Server(DNS) to  look up for the IP address associated with that website/domain. But before doing this the hosts file on our local computer is checked for the IP address associated to the domain name.For instance, the host name for Yahoo! is www.yahoo.com, while its IP address is 204.71.200.67 Either address will take you to Yahoo!'s site, but the www address will first have to be translated into the IP address. If you type in the IP address directly, your computer will not have to look it up.


What is actually does in this attack?

In this method we have to modified the victim's HOSTS file by adding the genuine domain name with the ip address of phishing page.we need to host our ip address.For hosting our ip address we need to make our pc to work as a Server.Whenever victim would visit the genuine website , he would be directed to our fake login page and domain name in the URL box would remain genuine as typed by victim. Hence domain name is spoofed.
I will explain with an example of orkut.Let see how to hack orkut through desktop phishing by domain spoofing.
Few Requirements :-
Download WAMP SERVER
Download HOST FILE
Download Orkut Fake Login Page

Step 1
  
1. First you need to download the Wamp server and install it on your computer.
2. Now, in task bar, simply click and press on Put Online.
3. Now, go to C:\wamp\www\ and paste here orkut fake login page(index.htm) with the xtreme.php file.
4. To check whether you have done this right, simply enter http://127.0.0.1 in address bar of browser and hit enter. You will get Phisher page you have copied in C:\wamp\www\.

Step 2

1. Go to http://www.ipchicken.com/ and copy your IP.
2. Open “Hosts” file you’ve downloaded using Notepad.
3. Now replace the xxx.xxx.xxx.xxx with your IP address.
4. Change www.orkut.com  to your website name (suppose if you wanna hack for orkut password then remain the same).
5. Save the file.

Step 3 (For creating standalone exe through which victims hosts file get replaced with your modified hosts file)

1. Winrar must be installed in your pc.
2. Right click on Hosts file and select “Add to Archive”.
3. Now, in window, change Archive Format from “.rar” to “.zip”.
4. Tick “Create SFX Archive”. Now, in “Advanced” tab, click “SFX Options”.
5. Now, in “Path to extract”, enter “C:\WINDOWS\system32\drivers\etc” (without double quotes).
6. In “Modes” tab, check “Hide all” and “Overwrite all”. Hit OK and again OK.

Now, you will get “hosts.exe” on desktop. This is what we required. Just send this  file to victim by mail or anyway to want and ask him to install it on his computer(Social Engineering).whenever victim tries to visit www.orkut.com , he is actually shown your phisher page by his browser and his browser address bar also shows the real address(i.e. www.orkut.com instead of your hosting url which looks like http://h1.ripway.username.com/index.htm) and thus we can easily hack his orkut password using Desktop Phishing by domain spoofing. The hacked orkut password is saved as passes.txt file in your “C:\wamp\www” directory.

Know How to Unlock Password Protected PDF and Ebook Files

1 comments
PDF files can be locked and password protected by several ways. And they carries several meanings as well. Some password protected PDF file can be viewed and read easily but we’ll need to input password to copy the text and images from it. Besides copy paste, the PDF file can be password protected to publish it in print media by disabling or password protecting the Printing ability of the document. Unless you read eBooks in printed form, it’s not necessary to unlock these PDF as most of the time you read it in your favorite eBook reader.
Unlock-PDF.com is free online tool to unlock the PDF files.
Simple steps to unlock the PDF file..


To unlock PDF files, click on Choose File and click on Unlock File button. After unlocking, the browser will automatically download the unlocked PDF file


Enjoy with your Unlock Files

Free Face Recognition Software for Automatic Log in to Windows 7

1 comments
Now days technology is changing very rapidly and every day something new discovered. Now Login to windows 7 through Face Recognition using a web-cam is one of the enhancements; a lot of us experimenting. Not only this save our typing but also is a more secure way if very much conscious about the security issue.

If you are also using Windows 7 and do have a webcam attached to the pc then you can test this a very little and tiny application called Blink; which may enable you to  log in to windows just by looking into the webcam only for just a second and your account wil be logged? How this is made possible because of the free software BLINK by Luxand which employs the advanced face recognition technologies to provide automatic, quick and reliable log in to one or many computer users.


Windows 8 is expected to have an Android like pattern logon screen where users can set a password based on user patterns. That can turn worth while on touch screen devices and get rid of the boring text passwords. That being said Windows 7 users don’t have anything cool to boast about at least when at logon screen. Neither do we have pattern logon or facial recognition screen in stock OS. While pattern logon may hit Windows 7 in the form of third-party app soon (Developers! Developers!) here is a free facial recognition software add-on.

This tool can be used as a free alternative to the commercially available “Fast Access” face recognition software that comes installed on many Dell laptops. Unlike Blink!, Fast Access being a premium product is feature rich.


Watch Video


Get IP Address of Your Fiends

1 comments
Many of us curious how to find ip address of OUR friends or any remote computer, here is the easiest way to do this :-


see how to do this.. 


Follow the steps to make this stuff works:
Step 1: Copy the below script in the notepad and save as iplogger.php(you can change name whatever you like and make sure that your file extension should be .php not .php.txt).


$file = 'IPs.txt';
$handle = fopen($file,'a');
if(!isset($_GET['p'])) { header('Location: http://google.com'); }
fwrite($handle, $_GET['p'].': '.$_SERVER['REMOTE_ADDR'].'\r\n');
fclose($handle)
?>


Step 2: Make a blank notepad file and save as ips.txt(you can change name according to your script).

Now you have two files i.e. iplogger.php and ips.txt . You have to upload this two files on the web hosting sites.


Step 3: You need to signup on a free webhosting service or any webhosting service that supports php like:
www.t35.com
www.110mb.com
www.freehostia.com
www.ripway.com etc…..
After getting your signup done, you have your own subdomain like for instance you registered with ripway.com, then your domain is like “http://h1.ripway.com/yourname/”

Step 4: Now Login to your ripway account and go to “My Files” in the Ripway.

Step 5: Upload this two files(iplogger.php & ips.txt) in your ripway account.

So when you’re done with the uploading part, the link to your ip logger is “http://h1.ripway.com/yourname/iplogger.php”.

 Step 6: Now this is your link that you have to send to your victim. When victim click on this link he will be redirected to the www.google.com(you can change the this address in the script) and his pc's current ip address save in ips.txt(make sure that chmod of ips.txt is 777).Open ips.txt to view his ip address..


Notice: THIS POST IS INTENDED FOR LEARNING PURPOSES ONLY!, WE WOULD NOT TAKE ANY RESPONSIBILITY FOR ANY KIND OF ILLEGAL ACTIVITY FROM YOUR SIDE

Know How to HACK with Fake Login Pages

0 comments
Collection of Fake Pages of all famous web logins (websites)...
just download and njoy...follow the post to know how to do phishing with these fake pages..
Click Here


For Yahoo Mail

For Rediff Mail

For Orkut New Updated

For Paypal

For Ebay.in

For Facebook

For Gmail

For Rapidshare


And Download All Fake Login Pages Here

 Notice: THIS POST IS INTENDED FOR LEARNING PURPOSES ONLY!, WE WOULD NOT TAKE ANY RESPONSIBILITY FOR ANY KIND OF ILLEGAL ACTIVITY FROM YOUR SIDE

Saturday 1 October 2011

Want to Make a SCARY Virus?

0 comments
Make a scary virus and do fun with your friends
Download this File and save it as virus.vbs


Open it, a message will appear on your screen "Warning! A virus has been detected on your PC.

Press YES to format your hard disk now or Press NO to format your hard disk after system reboot"
NOTE: It's just for fun, it will not harm your computer.

Turn Off Computer in 2 Seconds In XP

0 comments
We have been Turning off computer by common ways. So here's a new way to shutdown your computer with in 2 seconds. So follow these steps:-
* Go to Task Manager by pressing combination of Ctrl+Alt+Del or Go to start>run>type taskmgr or by pressing ctrl+shift+esc.
* Task Manager
will appear. Go to shutdown menu>press Ctrl key and select Turn Off menu item from shutdown, PC will turn off in 2 sec.


It works only in XP because here's no any option of shutdown menu in vista and window 7. However pressing the WINDOWS KEY, then U (SHUT DOWN) and then U (SHUT DOWN) will also do shutdown but it takes the similar time for shutdown as taken by the normal shutdown.